7.2.2 Creating Groups Manually
Note
Instead of creating groups manually, System Admin can create groups by importing an excel file. Teachers can send a request to Moodle E-learning Team with group member list by student ID.

1
Click the "Create group" button.

2
Input the group name.
3
Click the "Save changes" button to confirm.

4
Select the new created group.
5
Click the button "Add/remove users" to edit the group members for the manual created group.

6
Input the student information (e.g.: Student Name, Student ID) in the search field when necessary.
7
On the "Potential members" list, select the target students to be added. (Hold the "Shift Key" / "Control Key" to select multiple students at the same time.)
8
Click the "Add" button to add the selected students to the group.

9
On the "Group members" list, select the existing students to be removed from the group. (Hold the "Shift Key" / "Control Key" to select multiple students at the same time.)
10
Click the "Remove" button to remove the selected students from the group.
11
Click the "Back to groups" button when finished.
7.2.3 Creating Groupings
A grouping is a collection of groups within a course. Grouping can use for "Restrict Access", submitting assignment by groups.

1
Click the "Groupings" tab.
2
Click the "Create groupings" button.

3
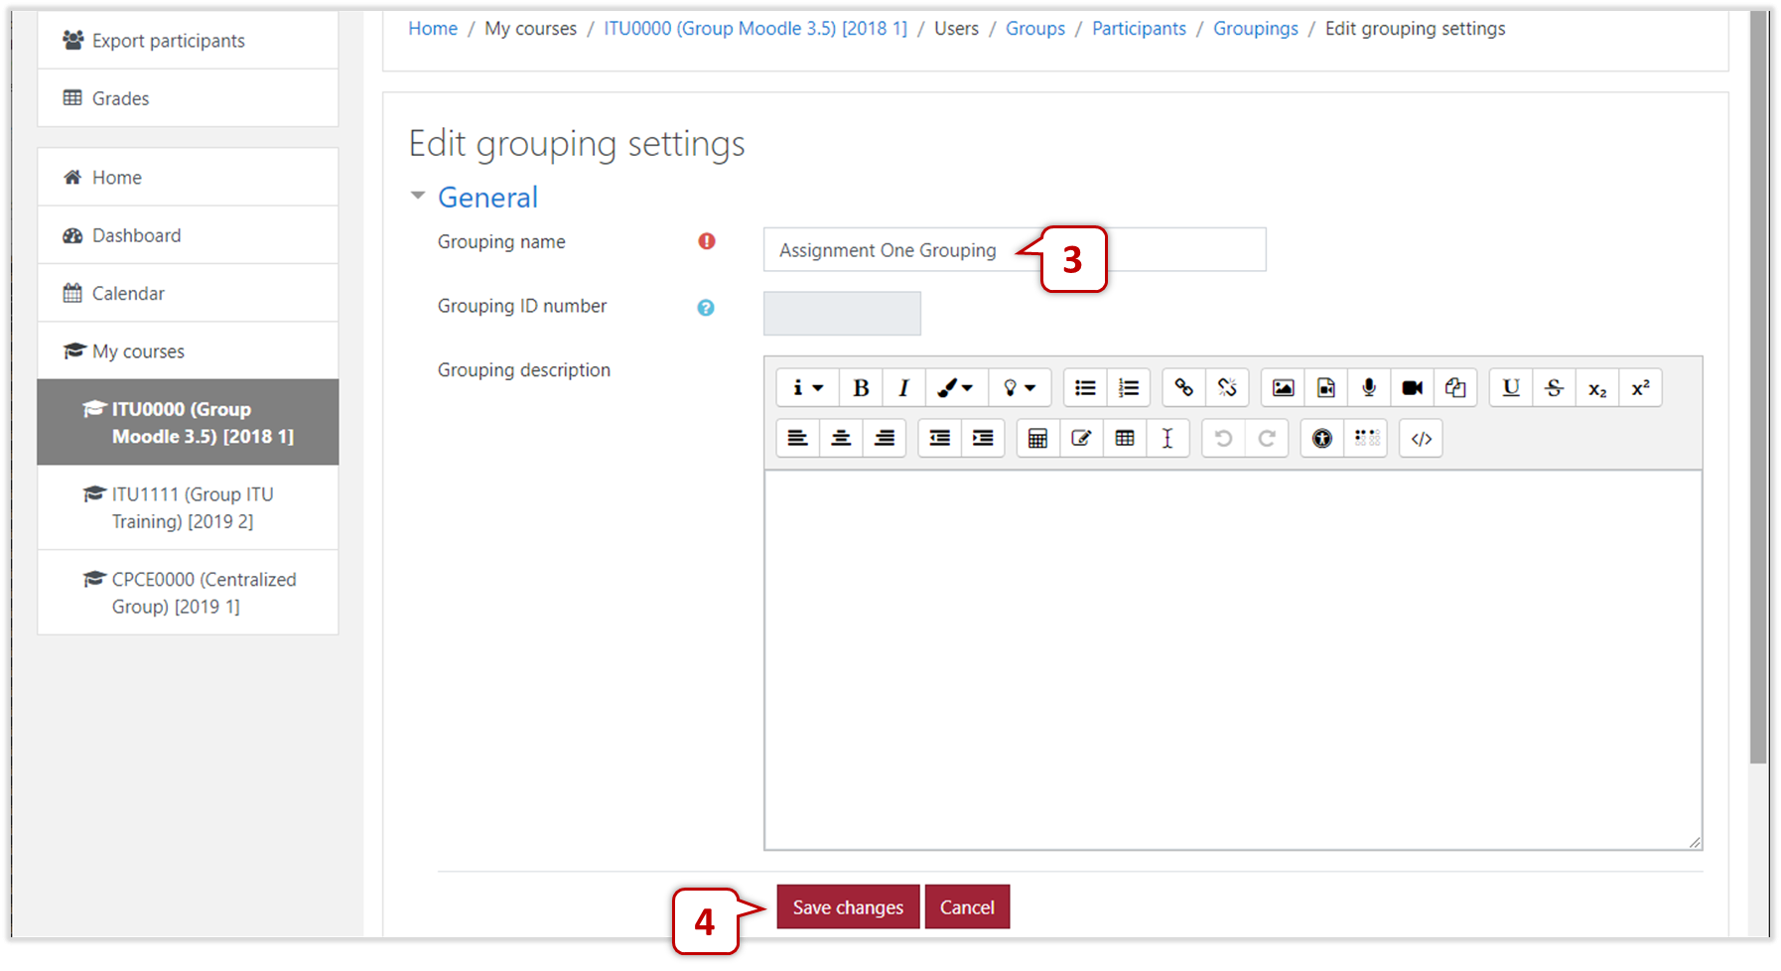
Input the grouping name.
4
Click the "Save changes" button to confirm.

5
Click the "Show groups in grouping" icon.

6
On the "Potential members" list, Select the target groups to be added. (Hold the "Shift Key" / "Control Key" to select multiple groups at the same time.)
7
Click the "Add" button to add the selected groups to the grouping.

8
On the "Existing members" list, Select the existing group(s) to be removed from the grouping. (Hold the "Shift Key" / "Control Key" to select multiple students at the same time.)
9
Click the "Remove" button to remove the selected group(s) from the grouping.
10
Click the "Back to groupings" button when finished.


